
Last weekend I finally decided to start working on a bikini. I bought half a meter of two beautiful fabrics (a nice one to make afirst attempt or muslin and a nicer one to make a second and definitive bikini) and a meter of a fleshed color bathing suit lining. The bathing suit fabrics were on sale at less than €5 a meter and the lining at €6.50.

As I enjoy making my own patterns and it is sometimes the best way to make something that matches your measurements, I followed the instructions described at the Pattern School. I traced first the bottom part of the one piece block and then I started to make the modifications to transform it into cheeky shorts. The patterns looked big on the paper, but I cut the fabric anyway, because in my experience patterns tend to look large when in fact they are not, especially after adding the seam allowances. But the result didn’t work. At all. It didn’t come large, it came huge. I thought of trimming 3 cm from each side but anyway I was not totally happy with how it fitted, so I decided to make my second option, that pattern so much pinned on Pinterest.

I was not completely convinced by the picture since the bottoms looked a bit floppy on the front (to my liking, eh). But after my completely failure I made the pattern for the bottom without almost any modification. I omitted the front elastic, so I modified the waist front to be completely straight instead of curved upwards to compensate for the elastic placement. I thought of making it a bit higher on the waist, but hey, better to try this one, treat this bikini as a muslin and make the correct modifications for the second bikini.

I had some issues sewing the lycra. I used my walking foot and a stretch needle and, after a bit of fiddling, it was mostly ok, but the real problem came when I had to stitch through the lycra and the elastic (I used bathing suit rubber, the one that smells like new bathing suits). I had a lot of tension issues. Take the bobbin out, make sure everything is fine, put the bobbin in, try with a scrap of fabric, take the bobbin out again, and like this to the infinite and beyond. I changed the waist, placing the elastic in between both fabrics. I don’t know if I really prefer this. I’m still not sure what I’ll do next time. I also didn’t use a different thread for the bobbin and the inside of my waist looks shabby, but it’s just a muslin and nobody is going to see the inside.
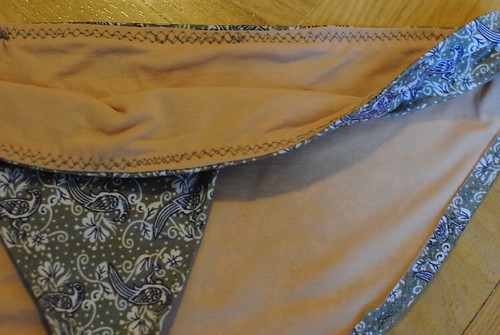
I tried to use my twin needles for that part and also for the leg openings, as a finishing, instead of using a zig-zag, but it came wrong. I blame the needles for not being stretch but regular ones, for they kept on skipping stitches. I gave up and made a zig-zag, which looks better than I expected.
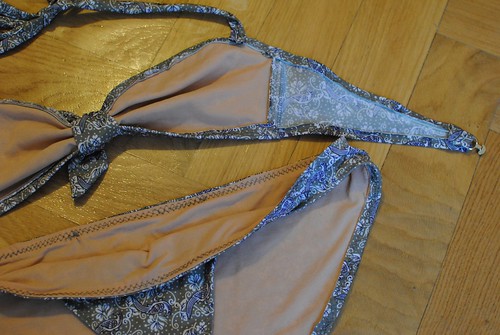
For the top I decided to continue with the same pattern. The truth is that I felt lazy to trace the pattern after the fail for the bottom, and I thought I could play a bit with the shape of the already made pattern to adjust it to my preference. I traced my pattern using those instructions and my measurements and I made my first modification. I reduced the sides from 10 cm to 8. Ten seemed a bit too much for my liking and I was right, this mod is not one that I regret.

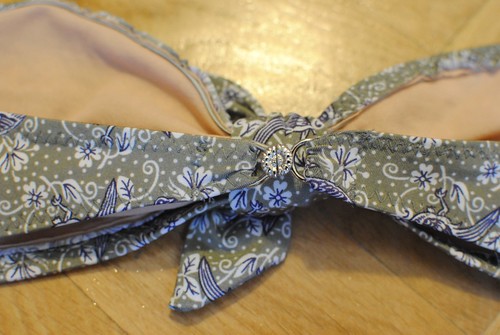
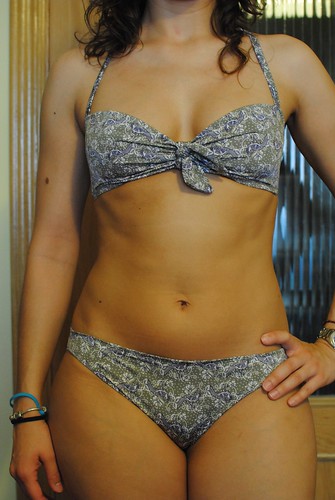
The other modifications were made along the way, adjusting here and there if I didn’t like the fitting. A clear one was the total length of the top. The fitting was wrong, too loose on my body, so I trimmed one inch from each end. Much better. I tried it once again and the front didn’t convince me at all. It looked floppy, handmade, loose. So instead of having the elastic just at the half top part, I placed it along the complete front, from top to bottom. Like that it seems to hold my breast much better. Even like that it was like there was something missing to make it complete. After some thought I cut a stripe of fabric of 10 cm x 50 cm with pointy ends, folded it length-wise and stitched along the edge, leaving a gap at the middle. I trimmed a bit the seam allowances and turned it inside-out. I tied this around the middle part of my top with a double knot. Now, this looks much better!

I also made mistakes in my execution, but as this is just a muslin for a second bikini I don’t mind too much. We also need to learn, and for sure we do it from our mistakes.
- The thread I used for the inside was not the best choice. The main fabric is grey so I’ve used that color thread (in fact it was a leftover from my Thurlows), but it looks bad on the inside. I could have avoided that by placing the lining in the way the pattern described (like for the leg openings), but doing that I don’t know how comfortable it would feel on my waist skin. I still have mixed feelings about that. I will have to wear this bikini a couple of times to be able to make a decision.
- When following the instructions for the top elastic for the top I cut two pieces for the top of the cups instead for the whole half, so I had to place a new piece of elastic for the the side afterwards, and doing that I think I’ve lost some structure. At the end the top had a bit of gaping on the front top. That I partially fixed by placing the elastic from top to bottom, but for the next bikini I should probably think of making that top elastic shorter, like how I mean to do for the leg openings.
After making this muslin, I know I will definitely wear it before making my second bikini. In part to test it, but also because I like how it came out. Off course I’ll make some mods for the next one, and for now, they will be:
- The vertical elastic for the top running completely from top to bottom;
- I’ll make a ribbon again, it looks cute and and with that pink and white ginghan fabric it will be super cute;
- Shorten the elastic on the leg openings to avoid gaping and rolling;
- Tweak a bit the back shape of bottoms on the leg openings.
After some wears I’m sure I’ll come up with new modifications. I’ll let you know.
Oh, I do like yours better than the original sample! Very cute knotted ribbon on the top. This can’t have taken you longer than a normal swimsuit shopping trip. And I like your attitude of treating it like a test run, though it seems very wearable to me. How advanced would you say this project is?
Thank you, Michelle 🙂 It should have taken less time than it really took, because I started with the wrong pattern and then I was too sleepy and I cut the fabric crosswise grainline. Twice! then I had problems to find the rubber for the leg openings, waist and top, so that delayed it too. I also tried the twin needle but I didn’t work for me.
As I’ve said, I had some tension problems and I abandoned the bikini for a couple of days. I think it was because of the combination of lycra and that rubber. For lycra you need a stretch needle. It’s just a bit blunt compared to normal needles, but I guess it had troubles to get through the rubber, so the tension came a bit wonky sometimes.
The project is not difficult by itself. The pattern is almost ready to use. The bottom is perfectly usable and the top needs to be made according to your measurements, but it’s easy peasy. Just take a ruler and you’ll have it in no time. The difficult part is dealing with the lycra, because you have to be careful to not get holes in it (use your pins always on the seam allowance); and the rubber. I’ve used a walking foot for most of the execution. I switched to a rolling foot at the end to sandwich the rubber inside the lycra, but in the Closet Case files, she uses a normal foot and even a regular elastic (though the rubber will be more durable for this kind of garment, exposed to the sun and sea water).
Another thing: when you sew with elastic fabric, try not to pull, but just feed the machine little by little (remember, no pulling from that fabric that was not stitched yet), otherwise you will get your fabric stretched out.
With all these I tested, and the wait for the rubber, taking into account that I only worked on it in my spare time, it took me a week.
The total cost of this bikini was less than €9, and that’s also important, especially if you take into account bikini prices nowadays.
Me encanta, te ha quedado precioso y a mi me parece que te sienta fenomenal. Tratalo como algo de prueba si quieres, y modificalo, pero hazme el favor de usarlo porque estás estupenda guapa!!!!
Muchas gracias 😀 La verdad es que me daba un poco de cosa publicar estas fotos, porque tengo unas caderas enooormes 😛
Para probarlo bien hay que ponérselo y darle uso como si fuera definitivo. Me lo pienso poner este mismo fin de semana. Nos vamos a Valencia, a la playita. A ver si puedo sacar más fotos del bikini. Gracias otra vez. Besos!
Que tú tienes unas caderas enormes?????? cuando quieras te enseño yo las mías y comparamos, jajaja. Tu disfruta con tu bikini que estas estupenda, y punto!!! y pásalo bien en Valencia.
Hey, this turned out great! Did you try using a sewn zigzag (the one which is basically straight stitches zigzaggin) – I use that usually for sewing this kind of stuff.
I’ve used a normal zigzag and it worked most of the time. I’ll try sewn zigzag next time. Thanks!