
One of the things I wanted to dip my feet into this year was bra making. The most popular bra patterns differ from the kinds of bra that I’m used to wearing, but I wanted to approach this like I did with shirt making: just an exercise to learn new techniques. Just to make it clear, I like foam cup bras with as less seams as possible, I’m not too keen on lace, and I usually go for basic colors like black or beige.
I bought in the past two kits and several patterns from Merckwaerdigh, but I never got to making them because I had problems with the measurements (mine didn’t seem to match any given measurements) and I needed some hand-holding at least during the first time.
The Watson Bra has become very popular nowadays, but it’s not underwired, and I figured it was just too basic, and since I don’t own any non-underwired bra since I was 16, this was not for me. I went then for the Marlborough Bra, since it looks so beautiful and everybody seems to be very happy about it. The instructions were very clear, but I’m a visual learner and I was not sure about what to make with all those laces, trims, and elastics, so I purchased the bra making class on Craftsy just to see how things should be done.
The class is mainly about a different pattern (Pin up Girls Classic Bra pattern, not included) but the concepts can be transferred to any other bra pattern. It really helped a lot in losing my fear of sewing bras, since I had these bra kits for several months and I was not able to bring myself to do anything with them. Finally, thanks to this class, I completed a bra in three days just sewing during spare moments.
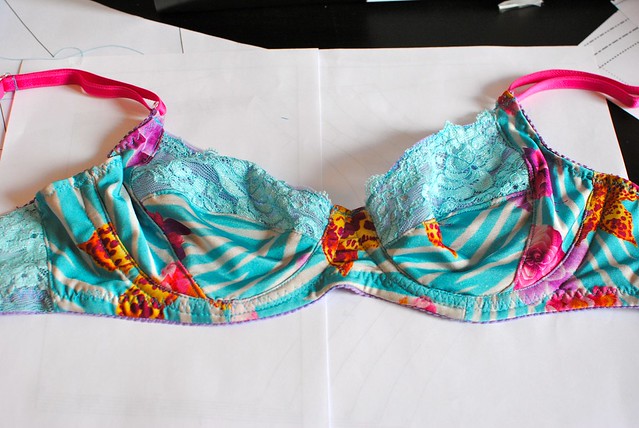
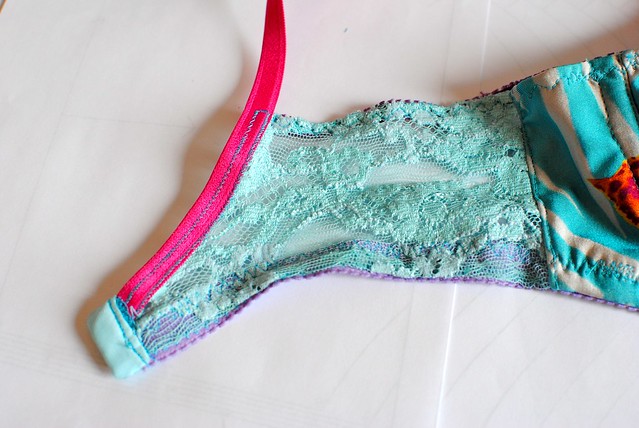
The teacher insists several times on not trying to do our best job with this first bra. And fear not, this is not my best sewing job by far. Sadly I have to report that I spent more time fighting with my machine than really learning or enjoying the process. Since the outer fabric of the kits is a flimsy knit, I decided to use my walking foot. I don’t know if this was the issue or if I just need to upgrade sewing machine, but I had issues with non even stitches almost all the time. My fabric tended to bunch up just behind my walking foot and I got tiny stitches too often. I switched to a regular foot and even a zipper foot to attach the rings to the bra front and for the hook and eye, but the results were not much better. I have used a brand new stretch needle, for your information, because the outer fabric was a knit.
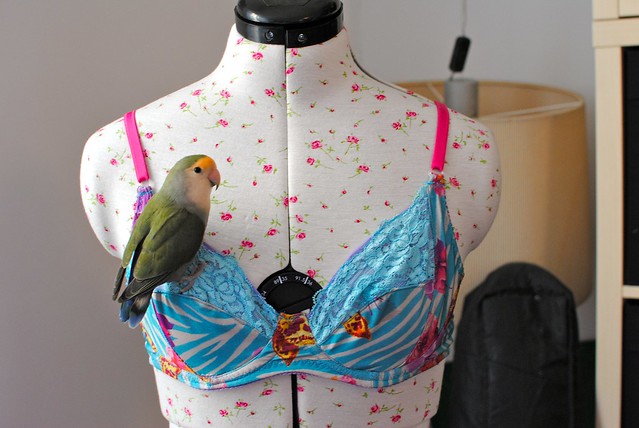
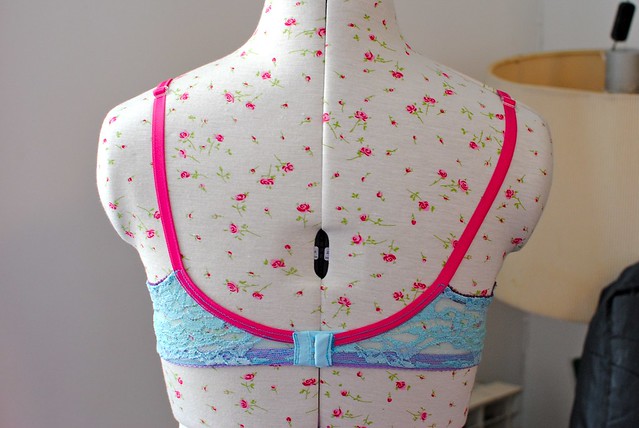
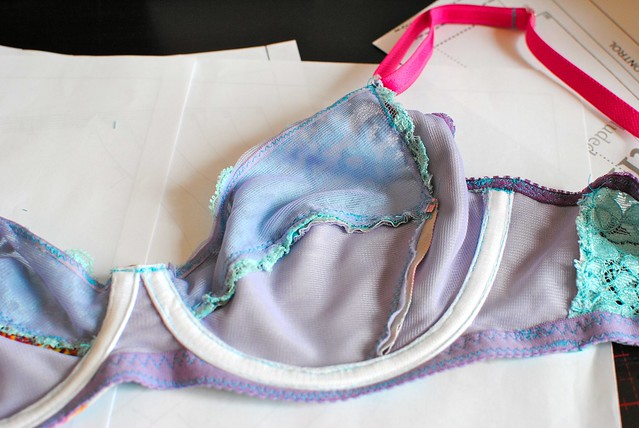
If you look at it from afar, it doesn’t look bad, and I have to report that it fits almost perfectly. I feels a little bit loose on the band but there could be two reasons for that. First, I have used stretch lace for the back band since it’s what the kit included. With power mesh or even folded lace I guess it would hold better. And second, my elastics got terribly stretched out during sewing, especially the top right. I’m not sure though if I should shorten the back bands, since the aforementioned points could explain this fitting issue.
The cups feel fine but I have something to say, and sadly it’s not a surprise. When I was a teenager and started shopping for bras and find out what I liked, I discovered that I was usually annoyed by seams running against my nipples (sorry for TMI). I switched then to bras without seams on that area and never went back, so I was not sure how I felt about it nowadays. I have to report that I still feel the same, and although making this bra was a wonderful exercise, I don’t feel like making another one to improve it since I won’t wear it due to those seams.
Most bra patterns I’ve seen have seams crossing the cups, and therefore are not suitable for my needs. I found though the following options that could be just what I’m looking for:
- Seamless cup bra (kit and pattern)
- Seamles Bra cups
- Some of these MakeBra patterns could also be ok
- Pin-up Girls Foamcup Bra Full Band
And while searching the internet, I found some other interesting stuff:
Corset making and boning:
All above links are from shops in Europe. If you are in a different part of the world, you may need to buy somewhere else.
I had some underwires that I purchased many months ago, so I don’t remember if they came from MakeBra or a local shop, but I had to shorten them a bit since they were too long for this pattern. I then applied several coatings of nail polish on the severed ends. I used blue just for fun to make it match my bra. Another thing that I should say is that this is the most colored bra that I own, and I’m not sure I would feel comfortable with all that lace and color.

And as it’s starting to become common, I leave you here another floating bra to show how it really fits (the things we do for our blogs), since even though my mannequin and me have the same measurements, our proportions are quite different (she has smaller boobs and broader shoulders and ribcage). I made size 34B and it’s the size I usually have for RTW.

It looks great for a first try! I love the fabric you’ve chosen, it’s so fun and bright. I don’t use a walking foot for bra sewing, you want to be able to see what you’re doing, and mine doesn’t give very good visibility. I did find that some slippery knit fabrics I need to use a microtex needle, but for most fabrics any old ball point is fine with my machine. Having said that, if you do make up another one, I would advise to use a much wider zig-zag, and not to do a triple zig-zag at all, you might do them on later bras, but while you’re still learning, they are much easier to rip out.
Thank you for the tips! I didn’t have to rip out while making this bra, it’s just that my stitches were not even and my machine didn’t want to cooperate. I wish my next bra will look as neat as the ones you make 🙂